

How to Clean Evaporative Cooling Pads
Table of Contents
How to Clean Evaporative Cooling Pads: Step-by-Step
What You'll Need Before You Start
Step 1: Isolate Power and Water
Step 2: Remove the Cooling Pads
Step 3: Clean, Rinse and Reinstall the Pads
Best Solution to Clean Evaporative Cooler Pads
Can You Use Vinegar in an Evaporative Cooler?
Which pad materials tolerate vinegar
Dilution and contact time
What not to do
Better options for heavy scale
Evaporative Cooler Mould Prevention
How Often to Replace Evaporative Cooler Pads
How water hardness drives replacement
Signs the pad is past cleaning
A practical inspection routine
Troubleshooting After Cleaning Your Evaporative Cooling Pads
Conclusion: When to Call a Professional
Frequently Asked Questions
Last Updated: October 5, 2026
How to Clean Evaporative Cooling Pads: Step-by-Step
Dirty cooling pads are the main reason an evaporative cooler stops cooling. Dust, mineral scale and mould clog the pad material, block airflow and cut cooling performance.

Cleaning evaporative cooling pads is the process of removing dust, debris and mineral scale from the pad material so air can pass through wet pads and cool the incoming air. It is the single most important task in seasonal maintenance.
Most guides skip the part that actually matters. Pad material decides how you clean it. A stiff pad tolerates a firm rinse. A soft one does not.
Below, we show you exactly how to do it in three steps.
What You'll Need Before You Start
Bucket of clean water
Garden hose with a soft spray nozzle
Soft brush or sponge
Mild detergent
Set aside an hour. Work on a mild day, not during a heatwave, so the cooler is off anyway.
Watch Out Never start pad cleaning with the cooler plugged in or switched on at the wall. Water and live electrical parts do not mix. Isolate the power at the circuit breaker and confirm the unit is off before you touch any panel.
Step 1: Isolate Power and Water
Turn off the cooler at the wall switch, then switch off the circuit breaker that feeds the unit.
Why both? The wall switch can be wired to the fan only. The water pump may still have power.
Wait a few minutes. Let the pump and motor wind down. Then check that the water tank is not overflowing before you open anything.
Step 2: Remove the Cooling Pads
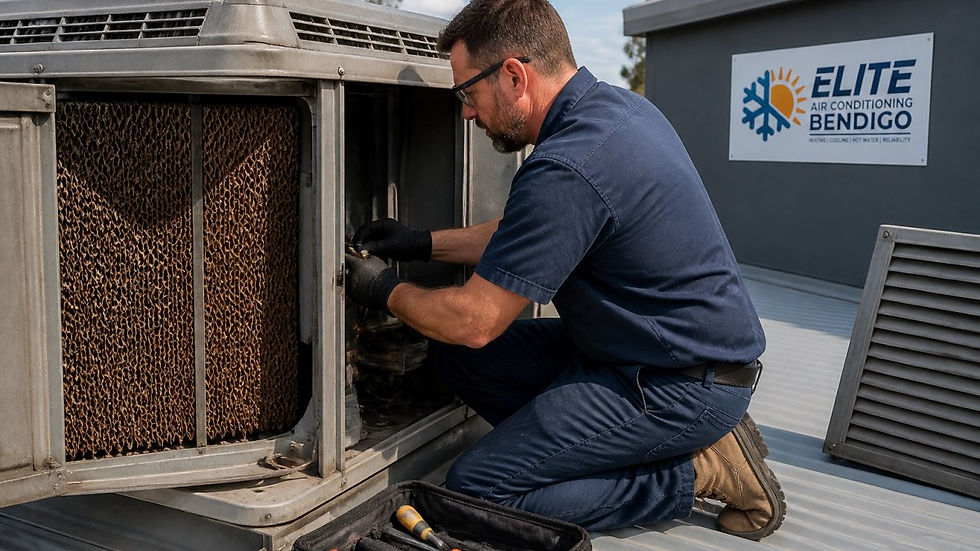
Open the side panels and lift out each cooling pad. Most units hold them in place with clips, brackets or a retaining frame.
Take a photo before you remove anything
Label pads if the unit uses more than one size
Support the pad from underneath as you slide it out
Check the water distributor tray above the pad while you are there
Look at the pad as you remove it. Heavy scale, sagging or a crusty surface means it may be past cleaning.
Step 3: Clean, Rinse and Reinstall the Pads
Rinse each pad with clean water first, working from the top down.
For mineral scale, see the descaling section below. Do not scrub hard. You will crush the pad structure and kill airflow.
While the pads dry, wipe out the cooler cabinet and flush the water tank.
Slide the pads back into their frames, reconnect the water distributor, and close the panels.
Pro Tip Run the pump and watch where water lands on the pad. If one strip stays dry, the water distributor holes above it are blocked. Clear them with a thin wire before you call it done.
Best Solution to Clean Evaporative Cooler Pads
The best solution to clean evaporative cooler pads is mild detergent mixed with clean water. It lifts dust and greasy film without damaging the pad material.
Here is what works, and what to avoid:
Solution | Best For | Avoid Because |
Mild detergent + water | Everyday dust and grime | Nothing, this is the default |
Vinegar (diluted) | Light mineral scale | Can damage some pad materials |
Commercial descaler | Heavy scale on rigid pads | Too harsh for soft pads |
Bleach | Never use | Damages pads, unsafe with airflow |
A common mistake is reaching for the strongest cleaner on the shelf. Pads are not tiles. They are porous and fragile.
For heavy scale, use a dedicated descaler made for evaporative coolers and follow the label. Rinse thoroughly afterward.
Can You Use Vinegar in an Evaporative Cooler?
Yes, diluted white vinegar can dissolve light mineral scale on evaporative cooler pads, but it is not a universal cleaner and it is not safe for every pad material. Vinegar works because the acetic acid reacts with calcium carbonate scale and converts it into soluble salts that rinse away. That same acidity is what makes it risky: it also attacks the binders and fibres in soft pad media, the rubber seals in the pump, and the galvanised or aluminium surfaces inside the cabinet.
Which pad materials tolerate vinegar
Rigid cellulose or paper media: Tolerates a short, diluted soak for light scale. Do not leave it soaking, the resin binder that holds the sheets together softens with prolonged acid contact.
Aspen wood wool pads: Generally tolerates a brief diluted rinse, but the wood fibres swell and shed if soaked. Rinse immediately and dry fully.
Glass-fibre or synthetic rigid media: The most acid-tolerant of the common pad types, but still rinse thoroughly, residue blows into the living space.
Soft, open-cell foam or honeycomb pads: Avoid vinegar. The acid degrades the cell structure and the pad loses its water-holding ability.
Dilution and contact time
A workable mix is roughly one part white vinegar to four parts water, about 250 mL of vinegar in a litre of water. Stronger is not better; it just attacks the pad faster. Apply with a soft spray or sponge, leave it in contact for no more than five to ten minutes, then rinse with clean water until the runoff runs clear and no longer smells of vinegar.
What not to do
Never pour vinegar into the water tank as a running additive. It will circulate through the pump, seals and any metal fittings for the life of the unit and corrode them.
Never mix vinegar with bleach or a chlorine-based cleaner. The reaction releases chlorine gas.
Never use vinegar on a pad that is already fragile, shedding fibres, or stained with mould. Cleaning will not restore it, replace it.
Better options for heavy scale
For hardened scale, a purpose-made evaporative cooler descaler is safer than vinegar because it is formulated to dissolve mineral deposits without attacking pad binders. Follow the label dilution and contact time exactly, keep it off the pump and metal cabinet where possible, and rinse until the water runs neutral. If you are unsure which pad material you have, check the manufacturer's label on the pad frame or the unit's manual before applying any acid.
Key Takeaway Vinegar is a descaling tool, not a cleaning routine. Dilute it, limit contact to minutes, rinse it out completely, and never add it to the tank. On soft or fragile pads, skip it and use mild detergent or a dedicated descaler instead.
Evaporative Cooler Mould Prevention
Mould grows in evaporative coolers when pads stay wet and dark between uses. The fix is simple: dry the unit out and keep water moving.
Mould prevention steps:
Run the cooler on fan only for 10-15 minutes before switching off
Drain and flush the water tank at the end of each cooling season
Clean or replace pads before storing the unit
Fix water leaks that keep the cabinet damp
A musty odour when you switch the cooler on is the clearest sign of mould.
For ongoing protection, a bleed-off system helps. It continuously drains a small amount of water, which reduces the mineral and organic buildup mould feeds on.
How Often to Replace Evaporative Cooler Pads
Replacement intervals depend on pad material, water hardness and how many hours the cooler runs each season. A useful starting point:
Pad material | Typical lifespan | Notes |
Aspen wood wool | 1 season | Sheds fibres, compresses and loses airflow quickly; often replaced annually |
Rigid cellulose / paper media | 2 to 3 seasons | Holds shape well but scale and mould shorten life in hard water |
Glass-fibre / synthetic rigid media | 3 to 5 seasons | Most durable, but still degrades with heavy scale or repeated acid cleaning |
Treat those as guides, not guarantees. A cooler run daily through a long, hot summer in a hard-water area can halve the expected life of any pad.
How water hardness drives replacement
Hard water leaves calcium and magnesium deposits every time the pad dries. Over a season those deposits build into a crust that blocks airflow and stops the pad wicking water evenly. The harder the supply, the faster this happens. If you are descaling the same pads more than once a season, the scale is winning and replacement is usually cheaper than repeated cleaning.
Signs the pad is past cleaning
Crumbling or shedding. Fibres come away when you rub the surface. The binder has failed.
Hard scale crust. Deposits are rock-solid and no longer rinse or descale out.
Mould staining. Black or green staining has penetrated the media, not just sat on the surface.
Uneven wetting after cleaning. Dry strips persist even with clear water distributor holes.
A practical inspection routine
Check pads at the start of every cooling season, before the first hot spell. Look for the signs above, hold the pad up to light to check for blocked areas, and feel for soft or crumbling sections. Mid-season, do a quick visual check for dry patches or a musty smell, both point to a pad that is failing or a water distribution problem rather than a cleaning problem.
Pro Tip Buy replacement pads by the exact model number on the unit or the pad frame, not by generic size. A pad that is slightly too small lets air bypass it, which cuts cooling and pushes dust into the cabinet.
Troubleshooting After Cleaning Your Evaporative Cooling Pads
Weak cooling after cleaning usually comes down to one of four things: dry pads, blocked water lines, a failing pump or pads fitted the wrong way around.
Work through this checklist:
Pads stay dry. Check the water distributor holes and clear any blockages.
Water flow is uneven. Flush the water lines and check the pump intake.
Cooling is weak but pads are wet. Confirm the pads are facing the correct direction.
Musty smell remains. The cabinet or tank still has mould. Reclean both.
Loud noise or vibration. A pad may be sitting crooked in its frame.
If the pump runs but no water reaches the pads, the pump or the water lines are the likely culprit. That is a job for a technician, not a DIY fix.
Watch Out Do not run the cooler with the pads removed to "test" it. Without pads, dust and debris pass straight into the motor and ductwork, and the unit will not cool.
Conclusion: When to Call a Professional
Some jobs are worth doing yourself. Others are not. If your cooler still underperforms after cleaning, or you find damaged pads, a failing pump or persistent mould, it is time to bring in a technician.
At Elite Air conditioning Bendigo, we handle pre-season servicing, pad replacement and full system checks. We also offer free on-site quotes, expert load calculations and help with point-of-sale VEU rebates if your old cooler is ready to be replaced.
Get started with Elite Air conditioning Bendigo and keep your cooling running efficiently all summer. Request a quote today.
Frequently Asked Questions
How often should evaporative cooler pads be replaced?
Most pads need replacing every one to three years, depending on water quality and use. Rigid cellulose pads typically last two to three seasons, while thinner aspen or wood wool pads may need annual replacement. Check for sagging, crumbling edges, hard mineral crusting or a persistent musty smell. If the pad no longer holds water evenly or airflow drops after cleaning, it is time for new pads. Hard water areas usually shorten pad life.
Can I wash evaporative cooler pads with a hose?
You can rinse pads with a garden hose on low pressure, but never use a high-pressure washer. Strong jets crush the pad structure and destroy the honeycomb channels that make evaporative cooling work. Hold the hose at a shallow angle and let water run through the pad until it flows clear. For stubborn mineral deposits, soak the pad in a mild detergent solution first, then rinse gently. Always let pads dry fully before reinstalling.
Can I run vinegar through my evaporative cooler?
White vinegar can dissolve light mineral scale on pads and in the water tank, but it should never be run through the whole system. Vinegar is acidic and can corrode metal components, damage the water pump and degrade pad binders over time. If you use vinegar, remove the pads and soak them separately in a diluted solution, then rinse thoroughly. For ongoing descaling, use a purpose-made evaporative cooler cleaner instead.
How do you prevent mould in an evaporative cooler?
Mould prevention comes down to three habits: dry the pads after each season, keep the water tank clean and ensure the unit drains fully. Run the fan only (no water pump) for 30 minutes before shutting down for the day. Check the bleed-off rate is set correctly so water does not sit stagnant. Clean the tank and pads at the start of every cooling season, and replace any pad that stays damp or shows black spotting.
Request a Quote

Comments